
Process a 3D Scan with projection in Reality Capture (RC)
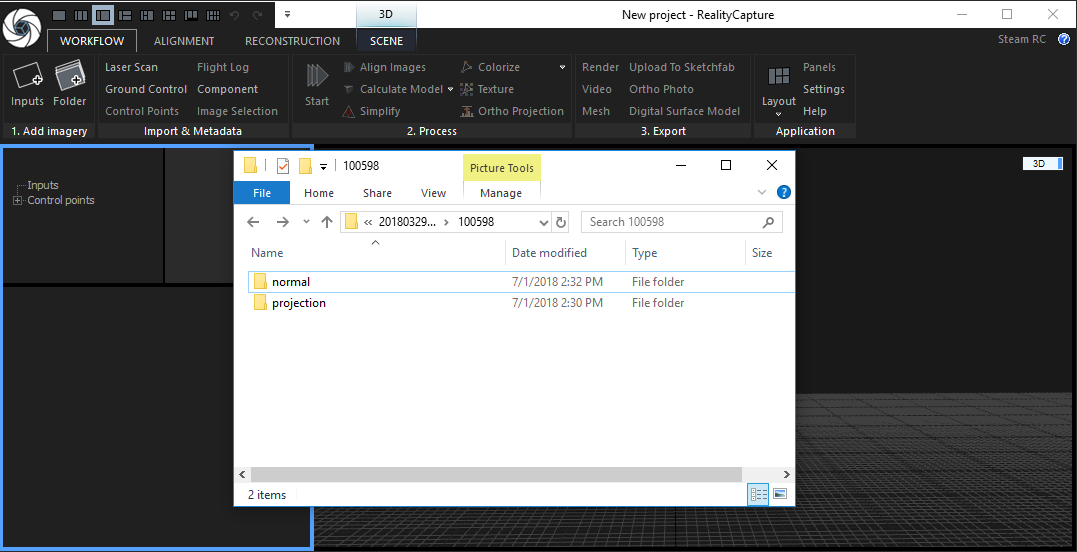
If you scanner is using projection, you will have 2 folders per scan. One is called the "normal" directory. This folder will contain the images made without projection and will later be used to create the texture (color information). The second folder is called "projection" and contains the images when the projectors are turned on and should be projecting a noise pattern onto the subject. This will improve the scan, especially if the subject has little unique details from its own, like smooth skin or a single color piece of clothing.

In RealityCapture click on the inputs button and select all the images in the projection folder and click on open.

The projection images are now loaded into the program and you can now start the 1st stage of the photogrammetry process, which is aligning (finding) the camera positions. Hit [F6] or click on the Align Images button.
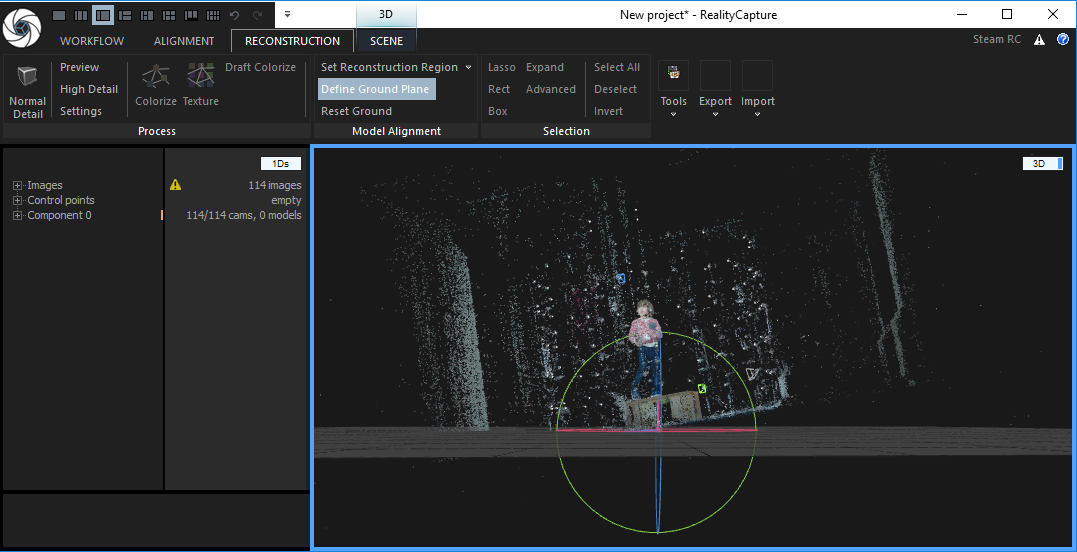
After the alignment process you should see in the 3D window a basic model, this is still a low resolution point cloud. As the software had no understanding of the real world, it is likely that you scan is diagonal in the environment. You can select the RECONSTRUCTION tab en click on Define Ground Plane. BY clicking and dragging on the circles you can straighten out the scan.

There is no point in trying to process the entire environment, so we can use the Set Reconstruction Region option, to create a bounding box around the subject. Just click somewhere near the subject and create a square around the subject, the 2nd click allows you also the set the height.

By rotating the viewing angle, you can also set the right height of the bounding box. You can click and drag on any of the circle in the bounding box, to correct the size of the box.

Now we have the bounding box correctly placed, we can start generating the model in high resolution. Click on the High Detail button and this will start the "dense cloud" calculation and will generate the mesh bashed on that. If you want a little but faster / less quality model, you can also choose to click on the Normal Detail button. This process can take a few minutes, depending on what kind of computer / video card you are using.
In the left 1Ds> window, you will now see the model and the amount of triangles it has. We can now export the model to an .OBJ file using the Mesh option in the Export tab.
| Clean up the model You should now clean up the model in a 3D Modeling program liek zBrush or 3D-coat (or any other). The final model should have less then 1 milion polygons (else 3D printers have issues with them). The model should be water-tight and you should of course have removed unwanted parts and cleaned up any 'errors' in the scan. |

After you have cleaned up the model, and saved it back to an .OBJ file, you can now re-import the cleaned file from the Import tab, by clickin on the Import Model button.

IMPORTANT: You should now see the imported model in the exact same location and same size. If this is not the case, you have done transformations on the model during the cleanup process. You should NOT do this. You will need to start over the cleanup process without doing any transformation actions (resize, move, rotate)

After we have properly imported the cleaned model, we can start work on creating the texture. For this we will need to use the images in the normal directory. RealityCapture does NOT have a function to change the location of the images, so we need to do this outside of RealityCapture. Open up your windows file browser. Change the name of the projection folder to an alternative name. In our case we will use the name 'projection_org'. Next change the name of the normal directory to projection. So now the projection folder contains the normal images that do not have any projection.

Now we can start the Texture creation process, by clicking on F9 or by clickin on Texture in the Process section of the Reconstruction tab.
Now we have the cleaned up model, with texture (without projection) created.

You can now click the Mesh button in the Export tab and it will save the model and texture files for you.